1. Introduction
GraphQL is a query language for your API and an alternative to REST APIs. It’s been developer by Facebook and later open sourced. It is now maintained by the GraphQL Foundation.
A difference between GraphQL and REST is that with GraphQL you can expose an API that can be queried by the client. The client can decide what fields it wants to retrieve compared to REST where the server decided on the format that is returned.
We’ll be creating a GraphQL application with Spring Boot 3.1 and a Postgres database. We’ll show how to retrieve data and how to send data in GraphQL.
2. Creating GraphQL Service
2.1 Creating the project
For the project setup we use Spring Initializr at https://start.spring.io/ For this project we want to use the following settings.
Spring Boot: 3.1
Language: Kotlin (or Java if you prefer)
Dependencies:
- Spring for GraphQL
- Spring Web
- Spring Data JDBC
- PostgresSQL Driver
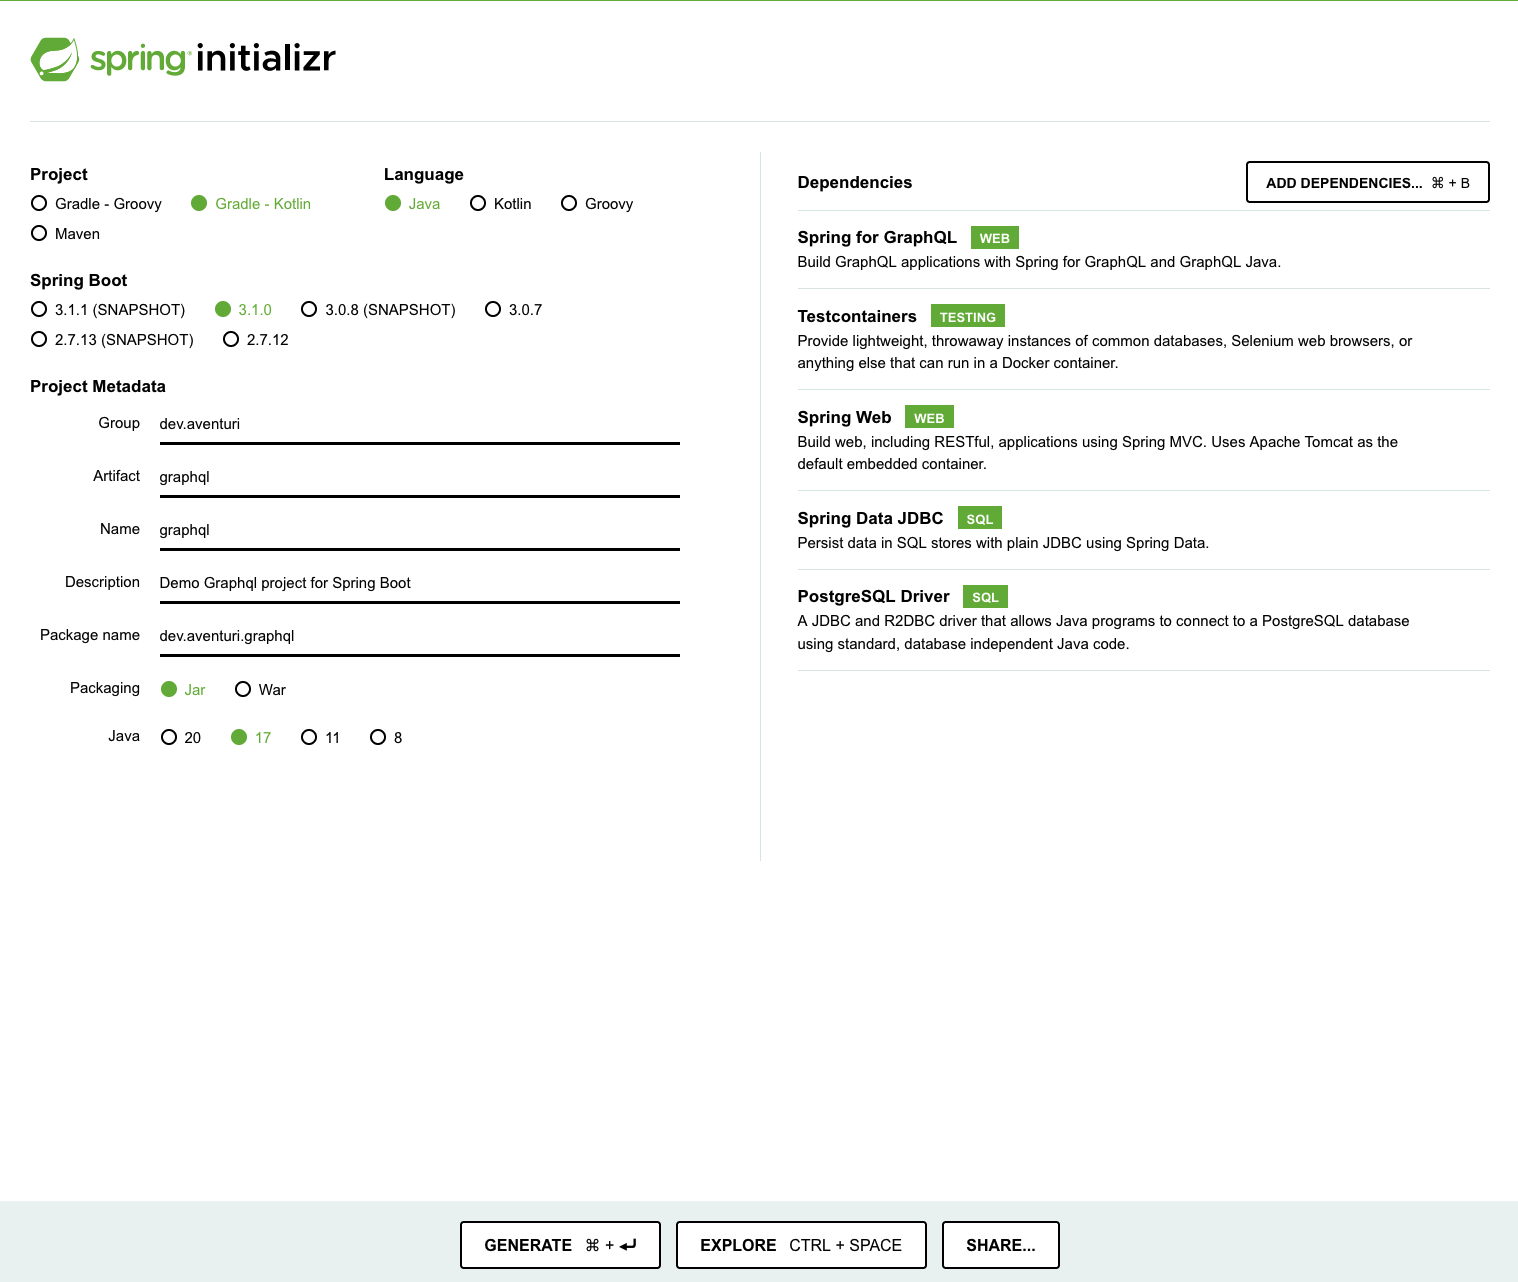
Now you can Generate the project and open it in your favourite IDE.
2.2 Setup Database
We want to add a Postgres docker container that starts with our application. With Spring Boot 3.1 there’s a new feature where Spring can retrieve information from docker-compose files to connect to a database.
We first add a dependency to our Gradle file to get support for this: developmentOnly 'org.springframework.boot:spring-boot-docker-compose'. Add this to your dependencies.
Create a docker-compose.yml at the root of your project graphql with the following content:
version: '3.8'

services:
  postgres:
    image: postgres:15.3
    restart: always
    environment:
      - POSTGRES_USER=graphql
      - POSTGRES_DB=consoles
      - POSTGRES_PASSWORD=password
    ports:
      - '5432:5432'
Because of the dependency we created on spring-boot-docker-compose Spring will retrieve the details to connect to the Postgres database with username: graphql and password: password (don’t do this at home).
2.3 Add data to database
Once you’ve opened the project we’ll start by creating the database and filling it with some information. We’re creating a table for gaming consoles and fill it with some consoles.
We start by creating a schema.sql and data.sql file under main > resources.
For the schema.sql We will it with the following information.
create table if not exists console
(
	id serial primary key,
	brand text not null,
	model text not null,
	year integer not null
);
This will give us a table console with the columns: id, brand, model and year.
To fill this table with some data we can use the data.sql file.
I created some values that can be imported
insert into console(brand, model, year)
values ('Nintendo', 'NES', 1983);

insert into console(brand, model, year)
values ('Nintendo', 'SNES', 1990);

insert into console(brand, model, year)
values ('Nintendo', 'Gameboy', 1989);

insert into console(brand, model, year)
values ('Nintendo', 'Switch (OLED)', 2020);

insert into console(brand, model, year)
values ('Playstation', 'PS', 1994);

insert into console(brand, model, year)
values ('Playstation', 'PS2', 2000);

insert into console(brand, model, year)
values ('Playstation', 'PS3', 2006);

insert into console(brand, model, year)
values ('Playstation', 'PS4', 2013);

insert into console(brand, model, year)
values ('Playstation', 'PS5', 2021);

insert into console(brand, model, year)
values ('Xbox', 'Xbox', 2001);

insert into console(brand, model, year)
values ('Xbox', 'Xbox 360', 2005);

insert into console(brand, model, year)
values ('Xbox', 'Xbox One', 2013);

insert into console(brand, model, year)
values ('Xbox', 'Xbox Series X', 2020);
(Please don’t sue me Nintendo, for using your name)
There’s one last thing we need to do to make sure the schema.sql and data.sql are picked up.
In the application.properties file we need to add: spring.sql.init.mode=always
If we start the application now it will start up the server. Connect to the Postgres database. First it runs the schema.sql file and then data.sql.
2.4 Creating the first GraphQL query
Now that we have a database with some data in it, we can start querying the data with GraphQL.
GraphQL uses different types for querying and changing data. We declare a query type of we want to get data and a mutation type if we want to send or change data
To query data we have to set up the Spring code to query data and a contract for GraphQL. Let’s start with the code in Spring.
We first need to declare a data class to represent the Console in the database to code
data class Console(@Id val id: Int? = null, val brand: String, val model: String, val year: Int)
Then we need a Repository class to get the data from the database and afterwards Controller class to expose that data to GraphQL
Since we’re using Spring JDBC we can set up the Repository class in the following way
@Repository
interface ConsolesRepository : CrudRepository<Console, Int> {
}
We now have an Interface that extends CrudRepository and is annotated with @Repository.
For now this is all we need to get all the Consoles.
@Controller
class ConsolesController(val consolesRepository: ConsolesRepository) {
    @QueryMapping
    fun consoles(): Iterable<Console> {
        return consolesRepository.findAll()
    }
}
Notice here the use of QueryMapping this is an annotation for GraphQL like you would use @GetMapping in REST APIs
So we’ve created a Controller class that injects the ConsolesRepository through parameter injection, and we created a function get an Iterable of type Console.
This is all the code we need, now we can declare the GraphQL contract.
For this we create a .graphqls file under main > resources > graphql, we’ll call it consoles.graphqls.
In the consoles.graphqls we type the following
type Query {
    consoles: [Console]
}

type Console {
    id: ID!
    brand: String!
    model: String!
    year: Int!
}
We defined a Query type, within the Query type we created a sort of function called consoles which returns a list of type Console. The Type is declared under and it and is in the same representation as the data class Console.
You can see that the consoles name matched the function name we created in the Controller class.
To enable graphiql interface we can add the following to application.properties: spring.graphql.graphiql.enabled=true
Now it’s time to start the application.
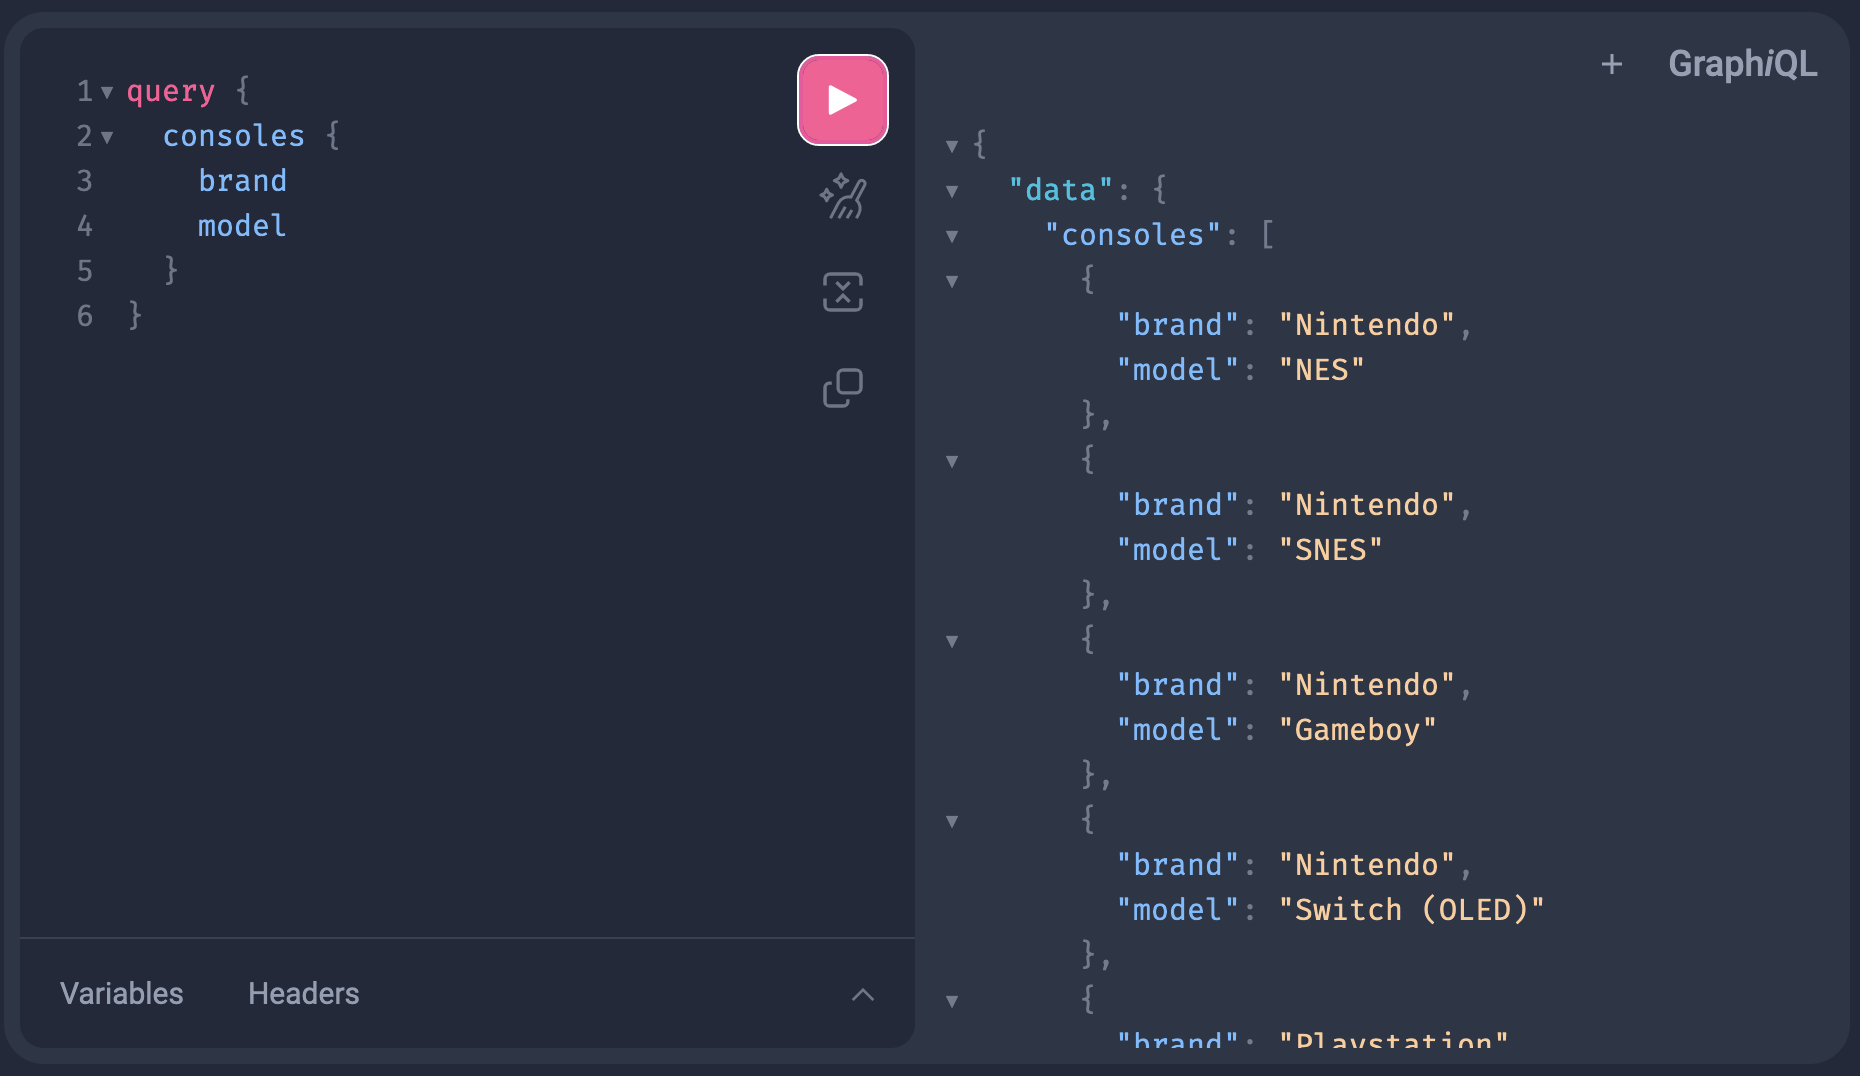
When you run the application you can go to http://localhost:8080/graphiql. Here you’ll be presented with the Graphiql interface we enabled earlier through the property file.
Now we can start querying. Graphql has autocomplete, so if you start typing “query” it will show the autocomplete options. Our query is called consoles so we can put in
query {
  consoles {
    model
    year
  }
}

type Console {
    id: ID!
    brand: String!
    model: String!
    year: Int!
}
This is one of the benefits of GraphQL, we can define the fields we want it to return. Only the model and year of the console is returned. If you want the ID to be returned you can do:
query {
  consoles {
    id
  }
}
Or if you want all the fields:
query {
  consoles {
    id
    brand
    model
    year
  }
}
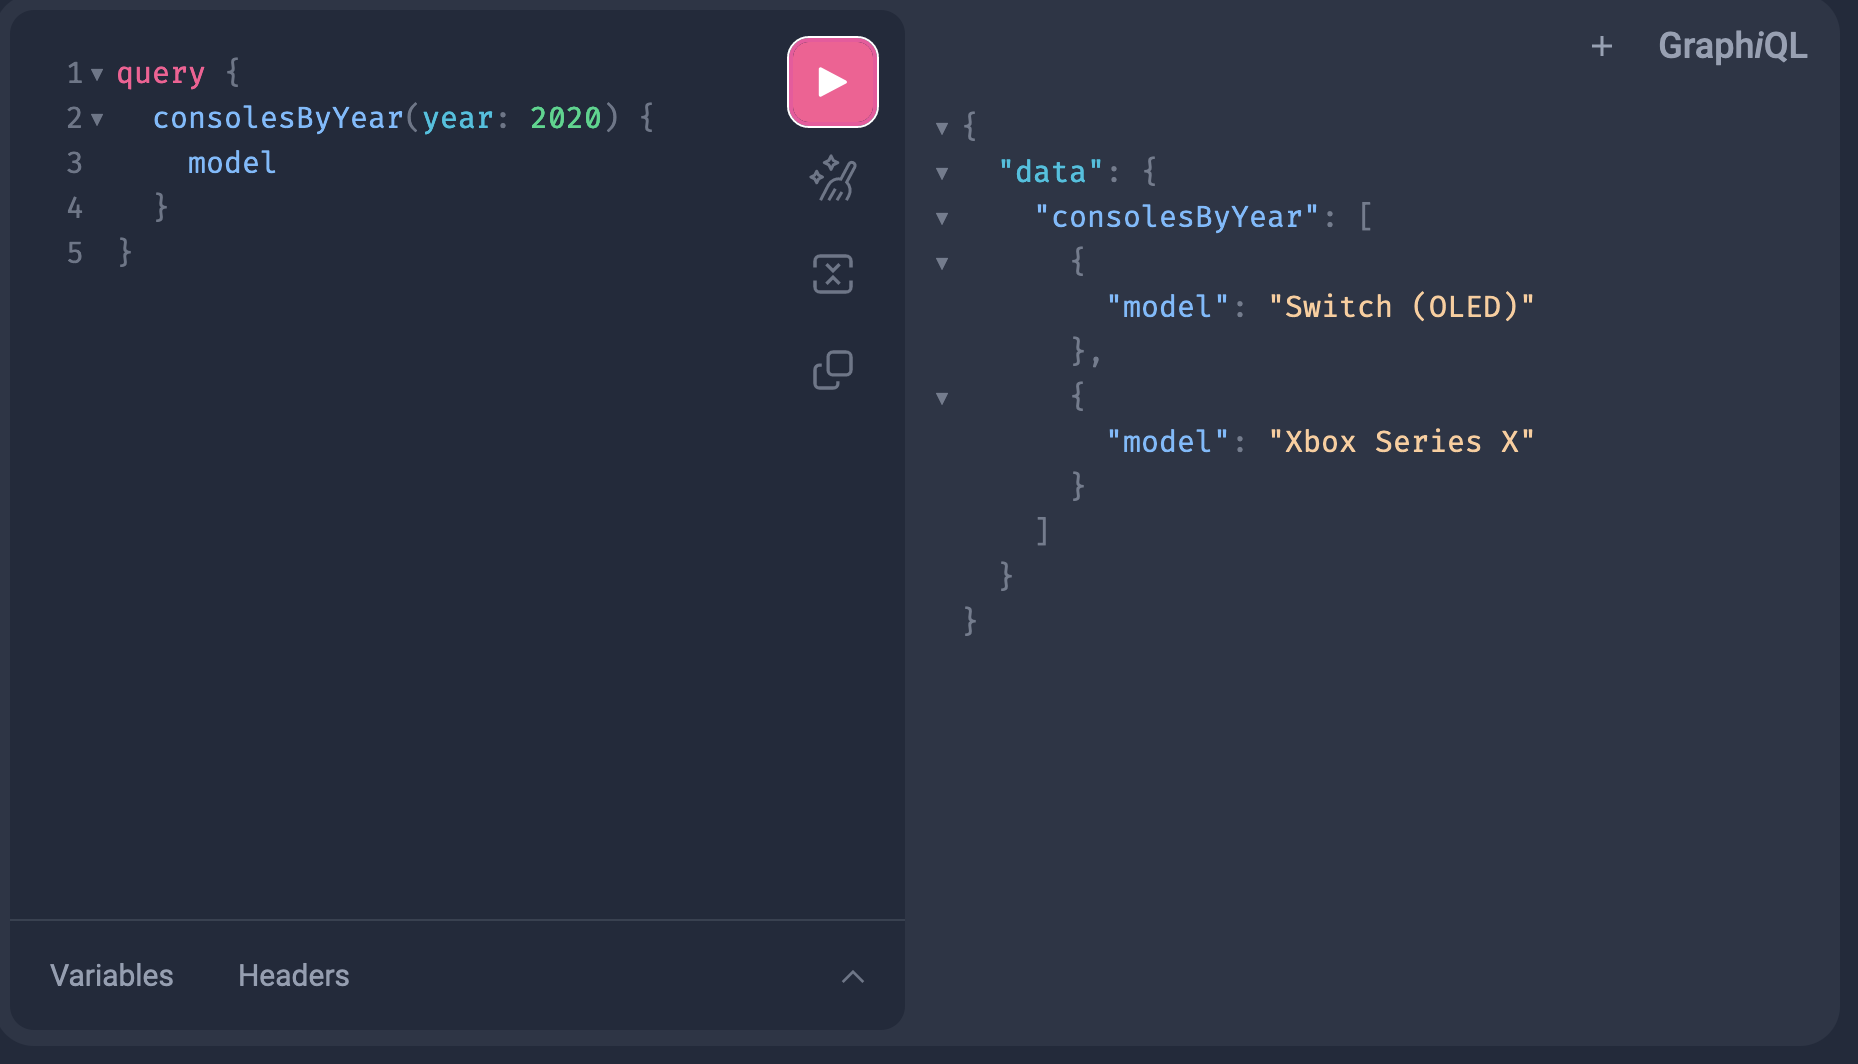
2.5 Adding parameters to query on
Now that we’ve got the first GraphQL query working, we might want to add values to query on.
For example, a year the console was released. @Argument is used to add values to query on.
Let’s add the functionality for that.
First we add the contract to the consoles.graphqls file
type Query {
    consoles: [Console]
    consolesByYear(year: Int): [Console]
}
We’ve added the consolesByYear with the year parameter and, it gives us a list of Console
Now for the ConsolesController we can do the following
@Controller
class ConsolesController(val consolesRepository: ConsolesRepository) {
    @QueryMapping
    fun consoles(): Iterable<Console> {
        return consolesRepository.findAll()
    }

    @QueryMapping
    fun consolesByYear(@Argument year: Int): Iterable<Console> {
        return consolesRepository.findAllByYear(year)
    }
}
We’ve added the consolesByYear function with an @Argument that calls the Repository for all consoles in a certain year.
Changes in the ConsolesRepository
@Repository
interface ConsolesRepository : CrudRepository<Console, Int> {
    fun findAllByYear(year: Int): Iterable<Console>
}
3 Final Thoughts
We’ve created a Spring Boot application with a database and a JDBC connection. On top of that we’ve created a Graphql interface to interact without database. If you’re familiar with REST interfaces you can see that not very different, annotating function and adding arguments to them to query the data needed.